
Key Takeaways
- Obsidian stores notes as plain Markdown files — the exact format AI agents read and write natively, with no conversion layer needed
- Connecting Claude to your Obsidian vault via MCP takes under 10 minutes and requires no API keys
- Features like Graph View, Dataview, Templates, Daily Notes, and Canvas turn a passive folder of notes into a queryable, agent-powered research system
Most AI agents have a memory problem. Every conversation starts from zero. You paste the same papers, re-explain the same context, and repeat yourself constantly — and the moment you close the chat, everything is gone. This is one of the core limitations of LLM agents today — they’re powerful at reasoning but have no persistent memory between sessions.
The fix is a persistent knowledge base your agent can actually read, search, and write to. And in 2026, the best tool for building one is Obsidian.
This tutorial walks you through everything — from installing Obsidian and setting up your vault, to connecting an AI agent via MCP and using Obsidian’s most powerful features to make your research papers queryable on demand. We use research papers as the running use case throughout, but the same setup works for any knowledge domain.
If you want to understand how to have an AI agent compile raw PDFs into structured wiki pages first, read our LLM Wiki Tutorial before continuing. This tutorial picks up where that one ends — you have a wiki, now let’s make it intelligent.
What Is Obsidian and Why Does It Work So Well with AI?
Obsidian is a local-first note-taking app that stores everything as plain .md (Markdown) files on your computer. No proprietary format, no cloud lock-in, no vendor dependency — just files in a folder.
That simplicity turns out to be its superpower for AI workflows.
Every major LLM was trained on Markdown. When your knowledge base is a folder of .md files, an AI agent can read it natively without the need of a parsing layer, API integration or format conversion. You point the agent at the folder and it just works.
On top of that, Obsidian has features that make a knowledge base genuinely useful rather than just a pile of notes: a visual knowledge graph, a live query engine, templates for consistency, and a canvas for visual mapping.
What You’ll Build
By the end of this tutorial you’ll have:
- An Obsidian vault structured for AI retrieval, with research papers as source material
- Claude connected to your vault via MCP — able to read, search, create, and update notes in real time
- A live research dashboard powered by Dataview
- A visual knowledge graph showing how your research concepts connect
- A daily research log the agent fills in automatically
- A visual research map built on Canvas
Part 1 — Install Obsidian and Set Up Your Vault
Step 1: Download and Install Obsidian
Go to obsidian.md and download Obsidian for your operating system. It’s free for personal use and runs on Windows, macOS, Linux, iOS, and Android. Install it and open it.
Step 2: Create Your Vault
A vault in Obsidian is just a folder on your computer. Everything inside it — notes, folders, attachments — lives there as plain files.
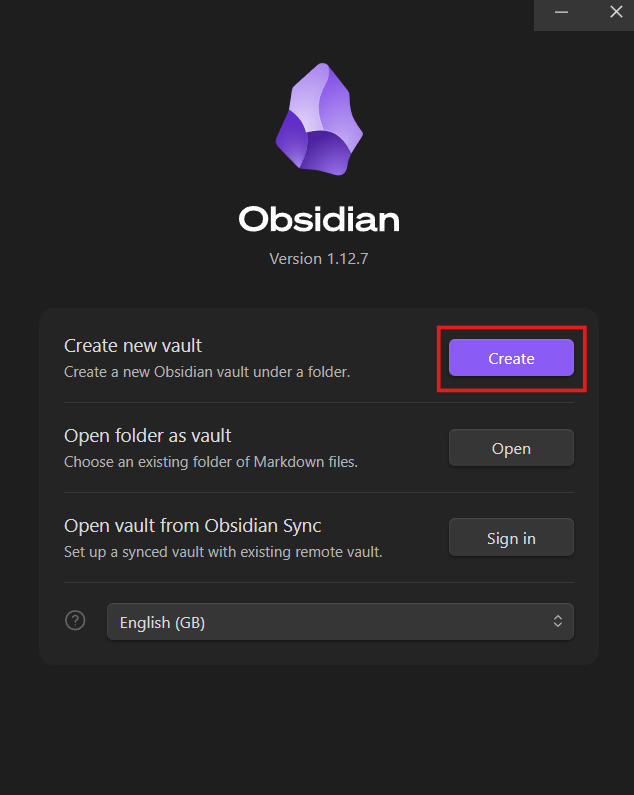
Click Create new vault and configure it:
- Name: Research-KB
- Location: A simple path with no spaces.
Step 3: Get Familiar with the Interface
Take two minutes to locate these panels, you’ll use all of them throughout this tutorial:
| Panel | Location | What it does |
|---|---|---|
| File Explorer | Left sidebar | Browse all notes and folders |
| Editor | Center | Write and read notes |
| Properties panel | Top of each note | Structured metadata |
| Command Palette | Ctrl+P / Cmd+P |
Run any action by typing |
| Graph View | Ctrl+G / Cmd+G |
Visual knowledge map |
| Settings | Bottom-left gear icon | All configuration |
Step 4: Create Your Folder Structure
Right-click in the File Explorer → New folder and create each of these:
Research-KB/
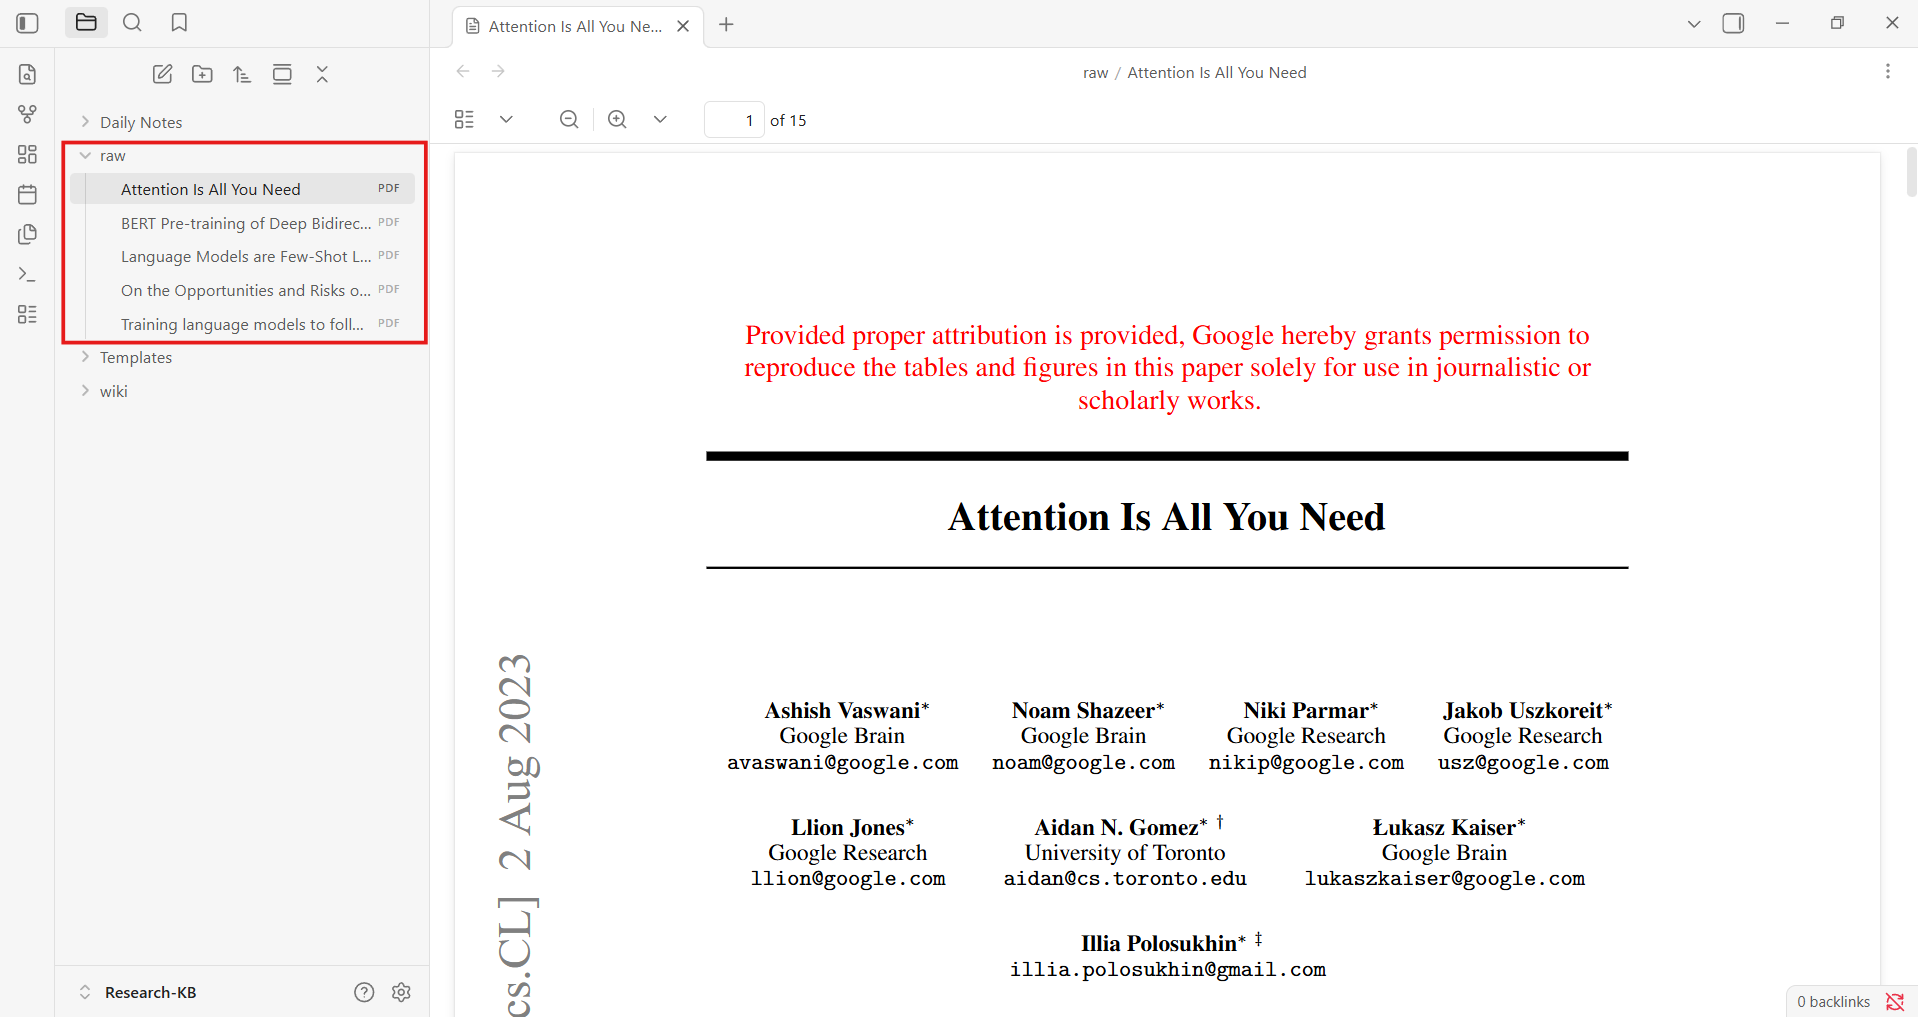
├── raw/ ← original PDFs go here
├── wiki/ ← agent-compiled knowledge pages
├── Templates/ ← note templates
├── Daily Notes/ ← daily research log
Copy your research PDFs into the raw/ folder directly from your file explorer and they’ll appear in Obsidian automatically. If you already have wiki pages from the LLM Wiki Tutorial, copy them into Research-KB/wiki/ now.
Step 5: Create Your AGENTS.md File
Create a new file in the vault root called AGENTS.md. This is the first file your agent reads, it tells the agent how your vault is structured and how to behave inside it.
Checkpoint: Your vault is set up. You should see raw/, wiki/, Templates/, Daily Notes/, and AGENTS.md in your File Explorer.
Part 2 — Connect Claude to Your Vault via MCP
MCP (Model Context Protocol) is an open standard that lets AI agents connect to external tools and data sources. Here it lets Claude read and write files directly inside your Obsidian vault in real time, without pasting anything into a chat window. If you want a deeper understanding of how MCP works under the hood, read our Definitive Guide to Model Context Protocol.
Filesystem MCP
This points Claude directly at your vault folder. No plugins, no authentication, no ports.
Prerequisites:
- Claude Desktop installed (not the browser version, download from claude.ai/download)
- Node.js installed — confirm by running node –version in your terminal. If missing, install from nodejs.org
Step 1: Find your vault path
In Obsidian, hover over the vault name at the bottom-left of the screen — it shows the full folder path. Copy it.
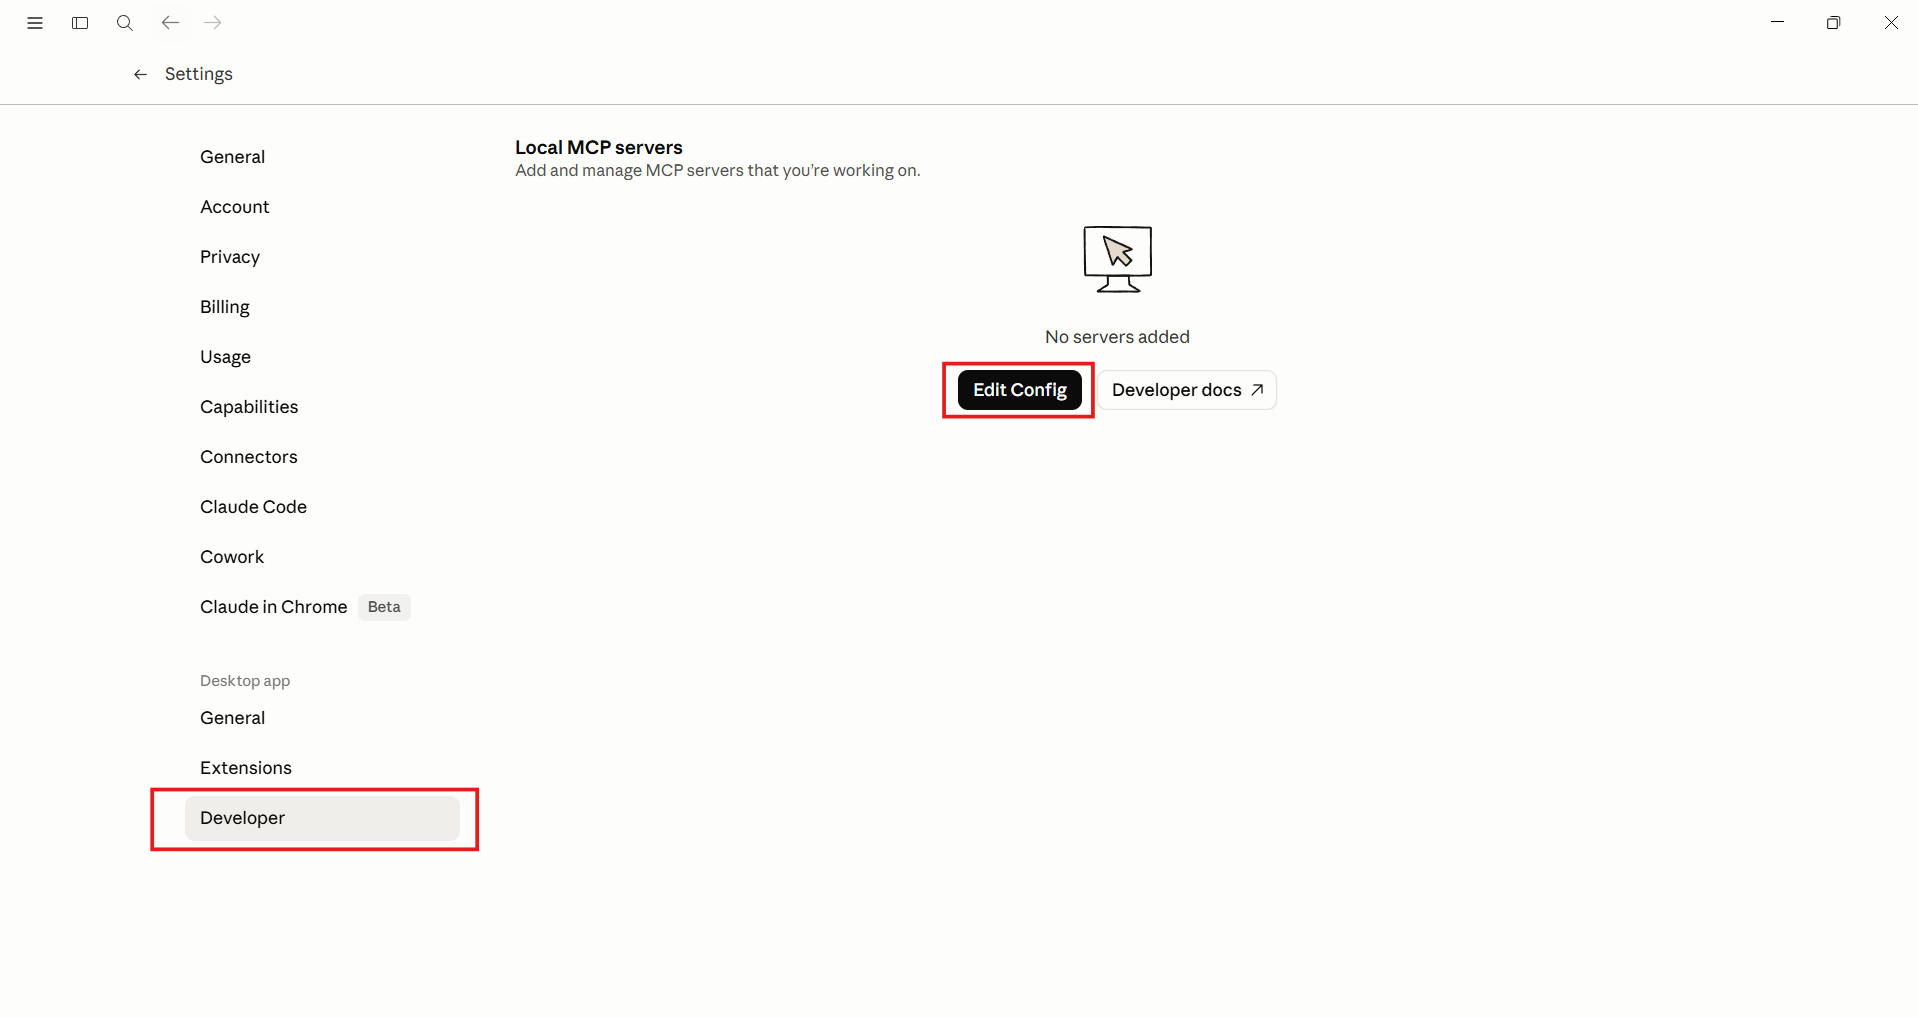
Step 2: Open the Claude Desktop config file
In Claude Desktop, go to settings. Scroll down to the Developer tab and click Edit Config.
Step 3: Add the MCP server
In the Config File, add your MCP server:
Replace the path with your actual vault path. If you already have other MCP servers in this file, add “research-kb”: { … } inside the existing “mcpServers”: { } block — don’t replace the whole file.
Step 4: Restart Claude Desktop
Fully quit, not just close the window.
- Windows: right-click system tray icon → Quit
Mac: Cmd+Q
Reopen Claude Desktop. Click the + sign in the chatbox, you should see a Connectors tab. Click it — you should see research-kb listed as an available tool. That confirms the connection is live.
Step 5: Test the connection
Run these prompts in order:
Check that test.md appears in Obsidian. If it does, delete it and move on.
Troubleshooting:
| Problem | Fix |
|---|---|
| Connector doesn’t apear | Config has a syntax error — check for missing commas or brackets |
| “Cannot attach to MCP server” | Path has spaces or is inside OneDrive — move the vault |
npx not found |
Node.js isn’t installed or not on your system PATH |
Part 3 — Tags and Properties: Making Your Research Queryable
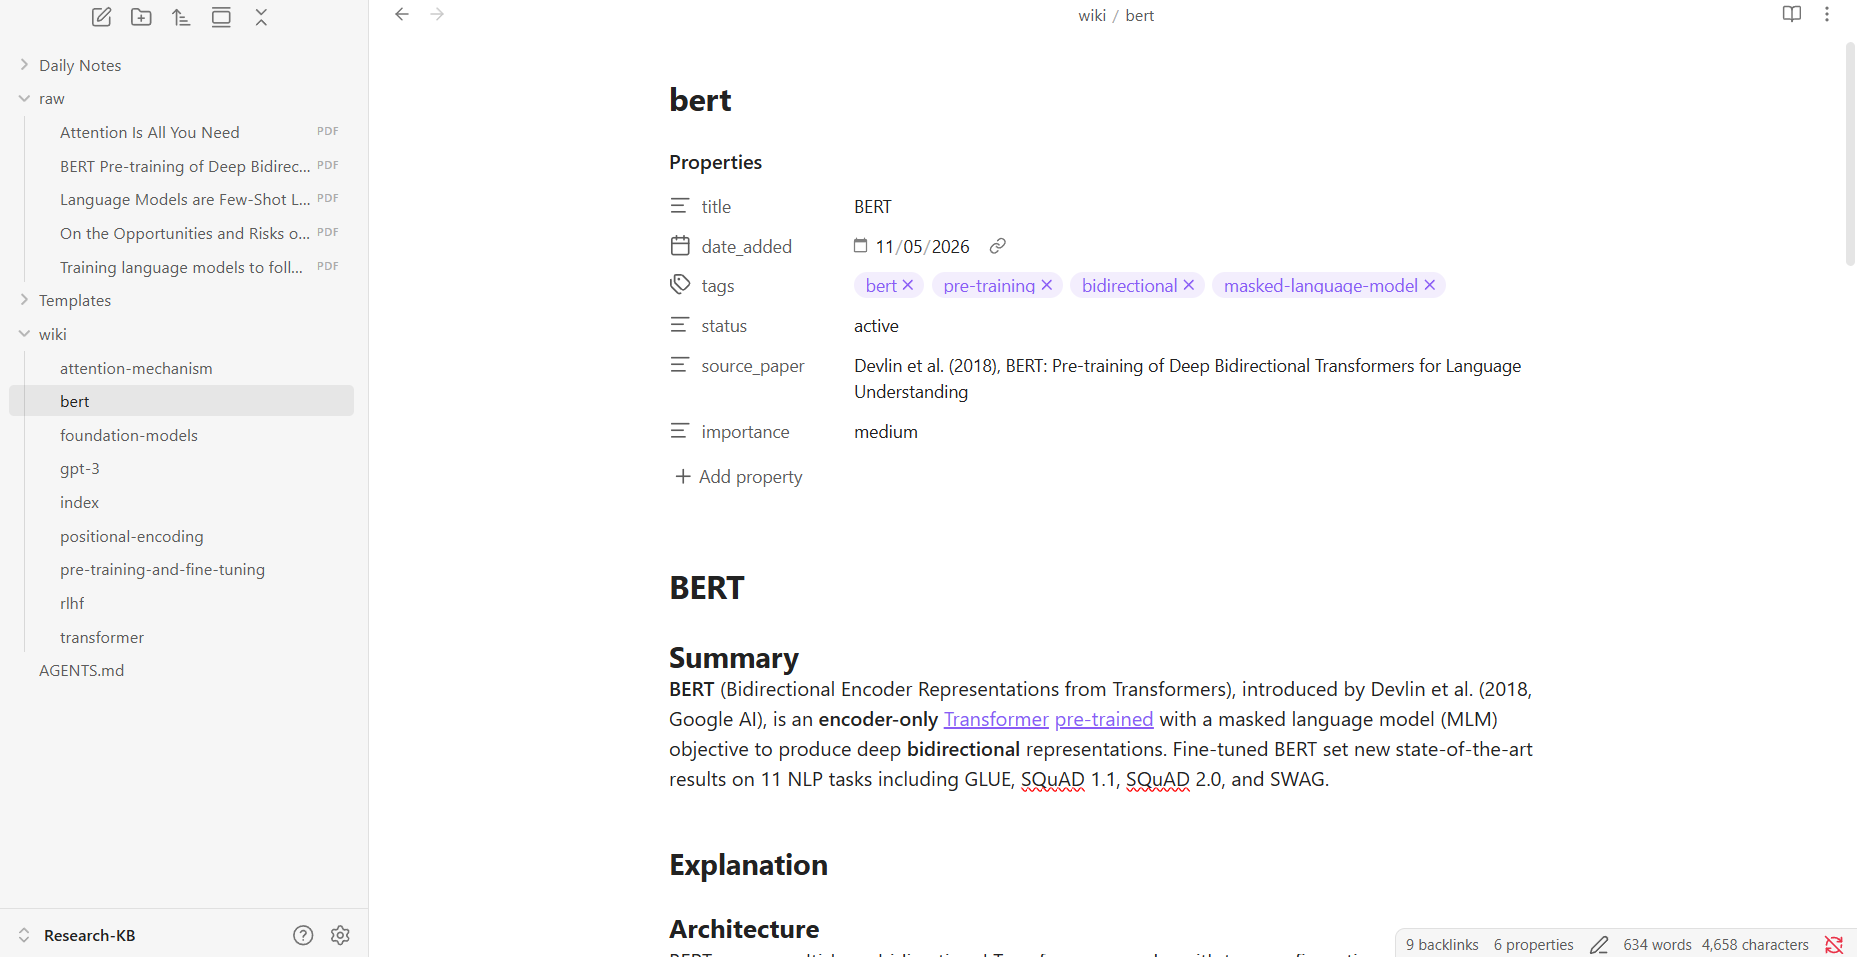
What Are Properties?
Properties are structured metadata at the top of every note — title, tags, date, status, source paper. They’re what transform a note collection into a queryable database.
Without properties, your agent can only do keyword search. With them, it can answer questions like “show me all concepts tagged as high importance” or “which pages are still drafts?” — precise, filtered retrieval that scales as your vault grows.
Add Properties to One Note Manually
Open any wiki page → click Add property at the top (or press Ctrl+;) → add these fields:
Do this for one note so you understand the format. Now let the agent handle the rest.
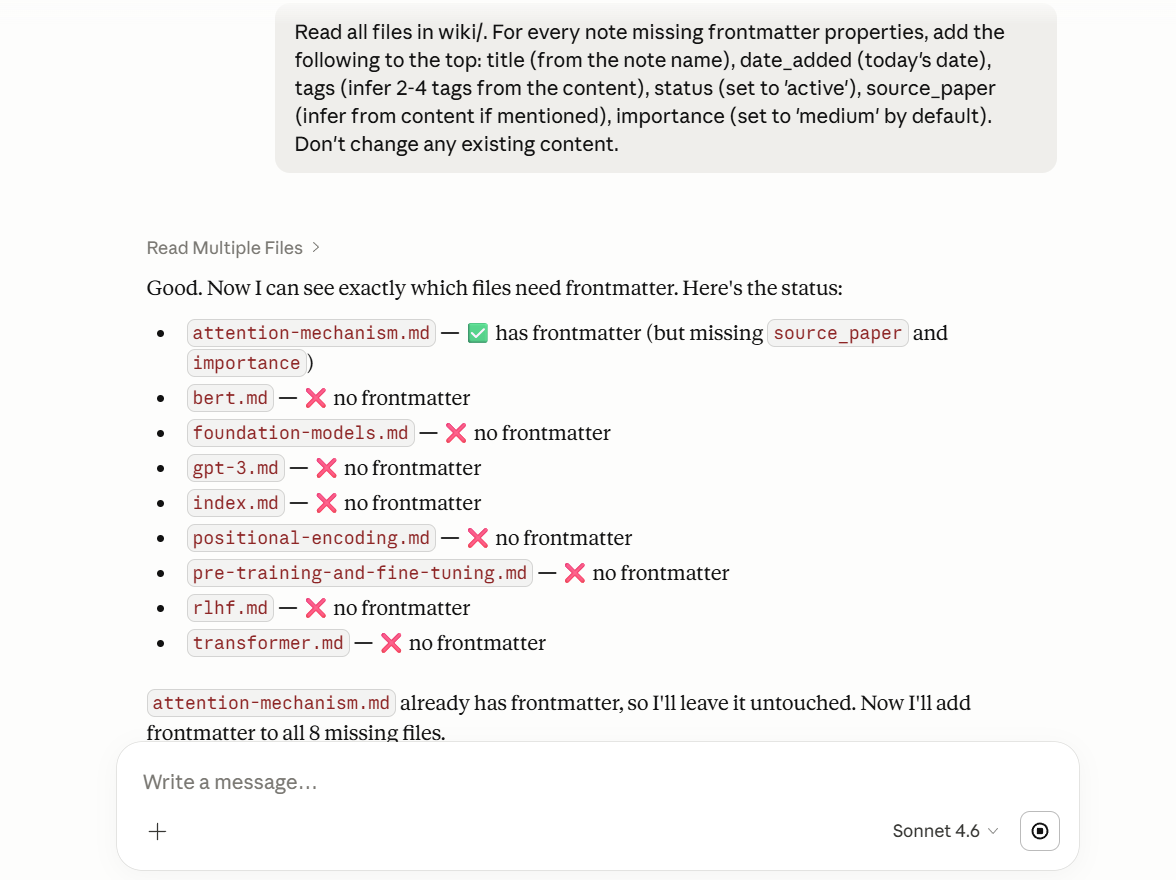
Let the Agent Add Properties at Scale
After it runs, click through a few notes — you should see the properties panel populated consistently across all pages. This consistent structure powers every feature that follows.
Part 4 — Templates: Consistent Notes Every Time
Why Templates Matter for AI Knowledge Bases
As your agent compiles more papers, inconsistent note formats break everything downstream — Dataview queries fail, the agent gets confused about where to find information. Templates enforce a consistent skeleton on every note the agent creates.
Set Up Your Wiki Page Template
Settings → Core plugins → Templates → toggle on
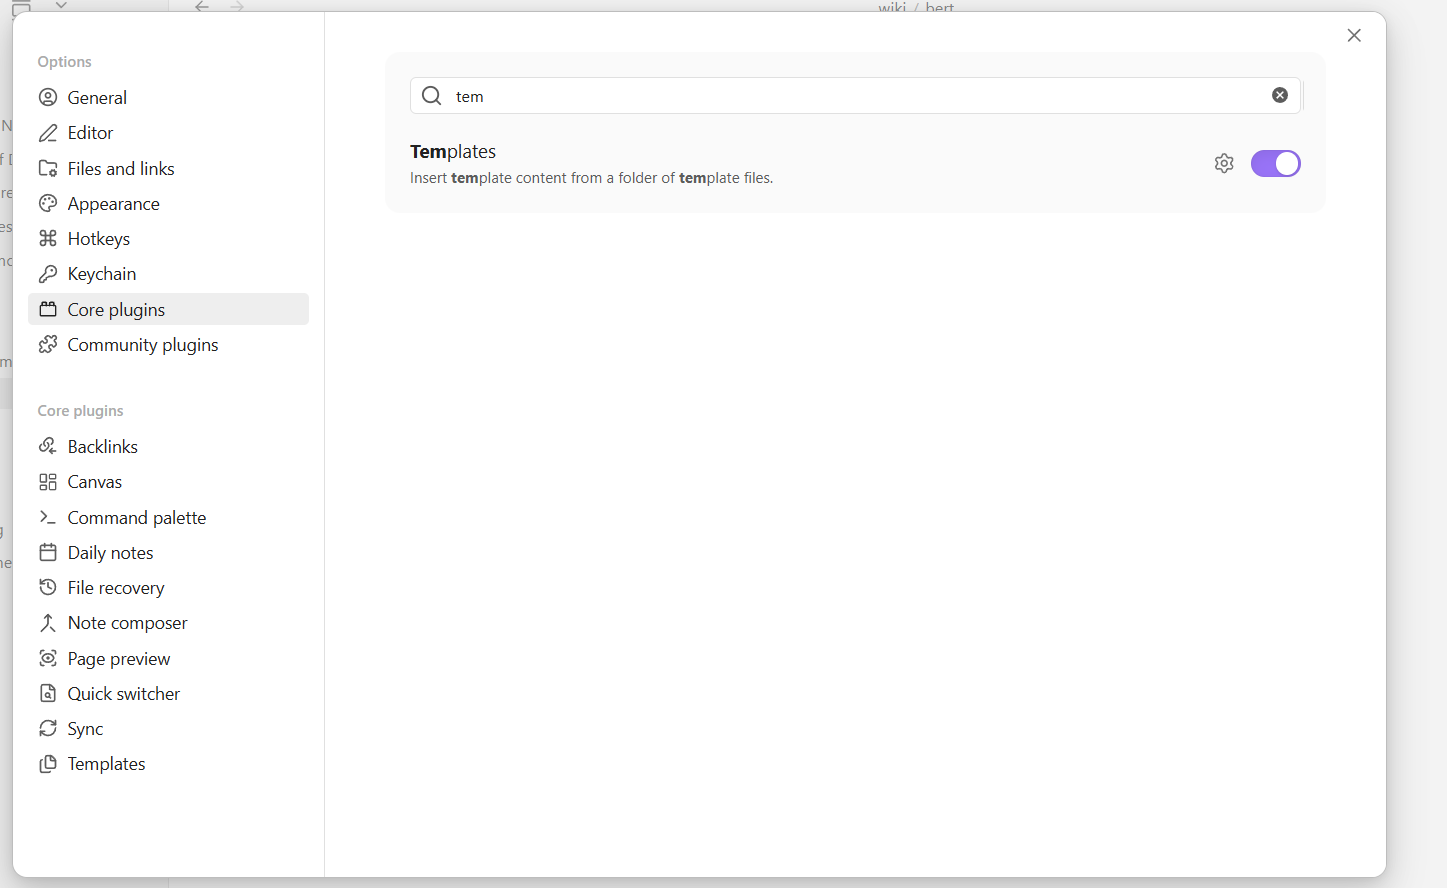
Settings → Templates → set folder location to Templates
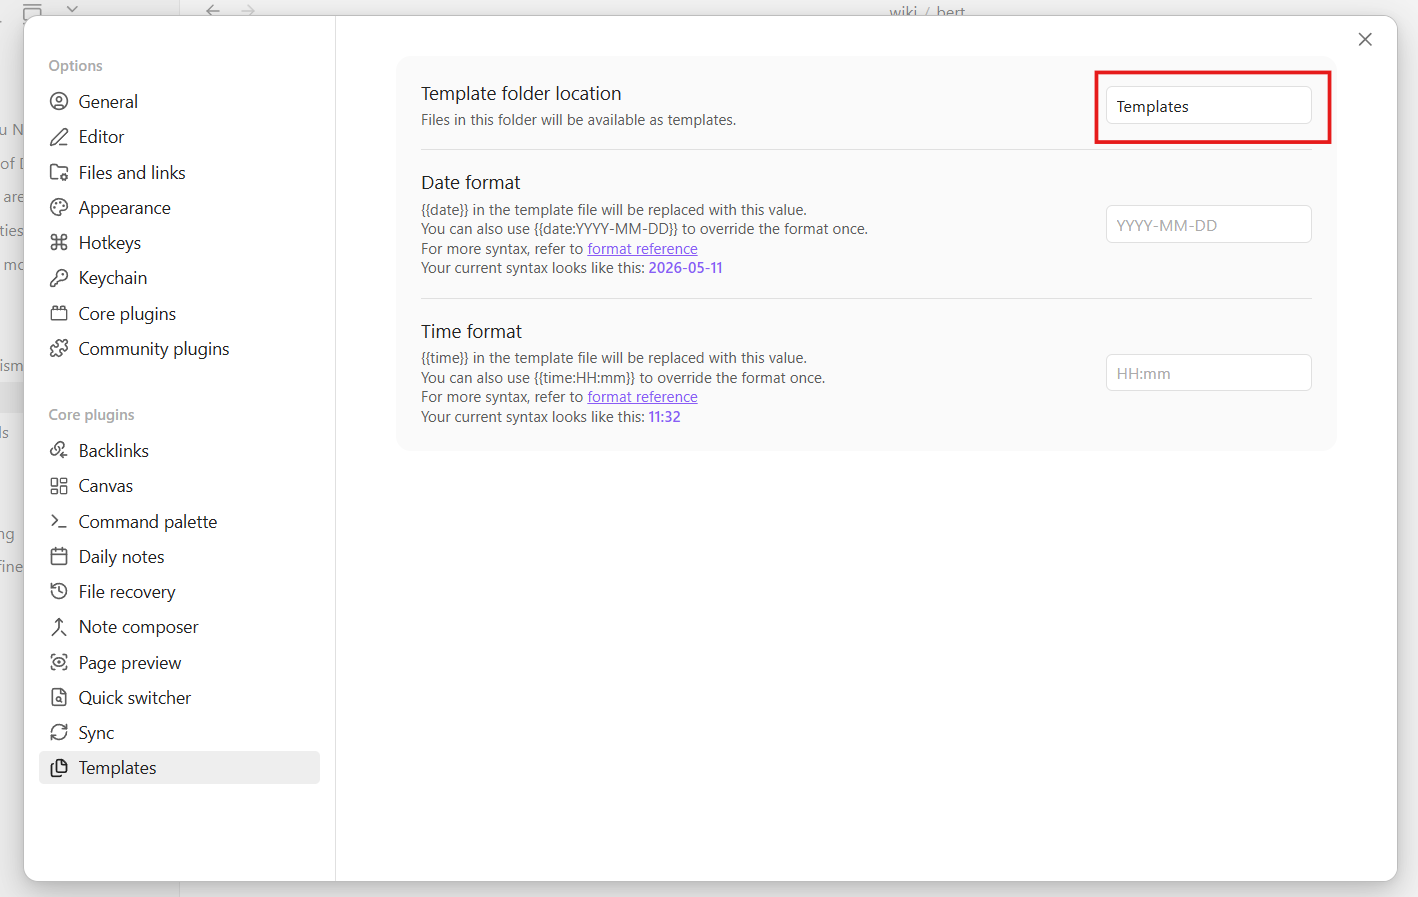
Create Templates/Wiki Page.md:
Test It Manually
Create a new note → press Ctrl+P → type “Templates: Insert template” → select “Wiki Page”. The template structure fills in automatically.
Tell the Agent to Use It
Add this to your AGENTS.md:
Then test:
“Create a new page called ‘Scaling Laws.md’ in wiki/ about scaling laws in large language models. Follow the template in Templates/Wiki Page.md exactly.”
Check that the note matches the template — all sections present, frontmatter filled in.
Checkpoint: Every new note your agent creates will follow the same format. Dataview queries and cross-note searches will work reliably from here on.
Part 5 — Graph View: See How Your Research Connects
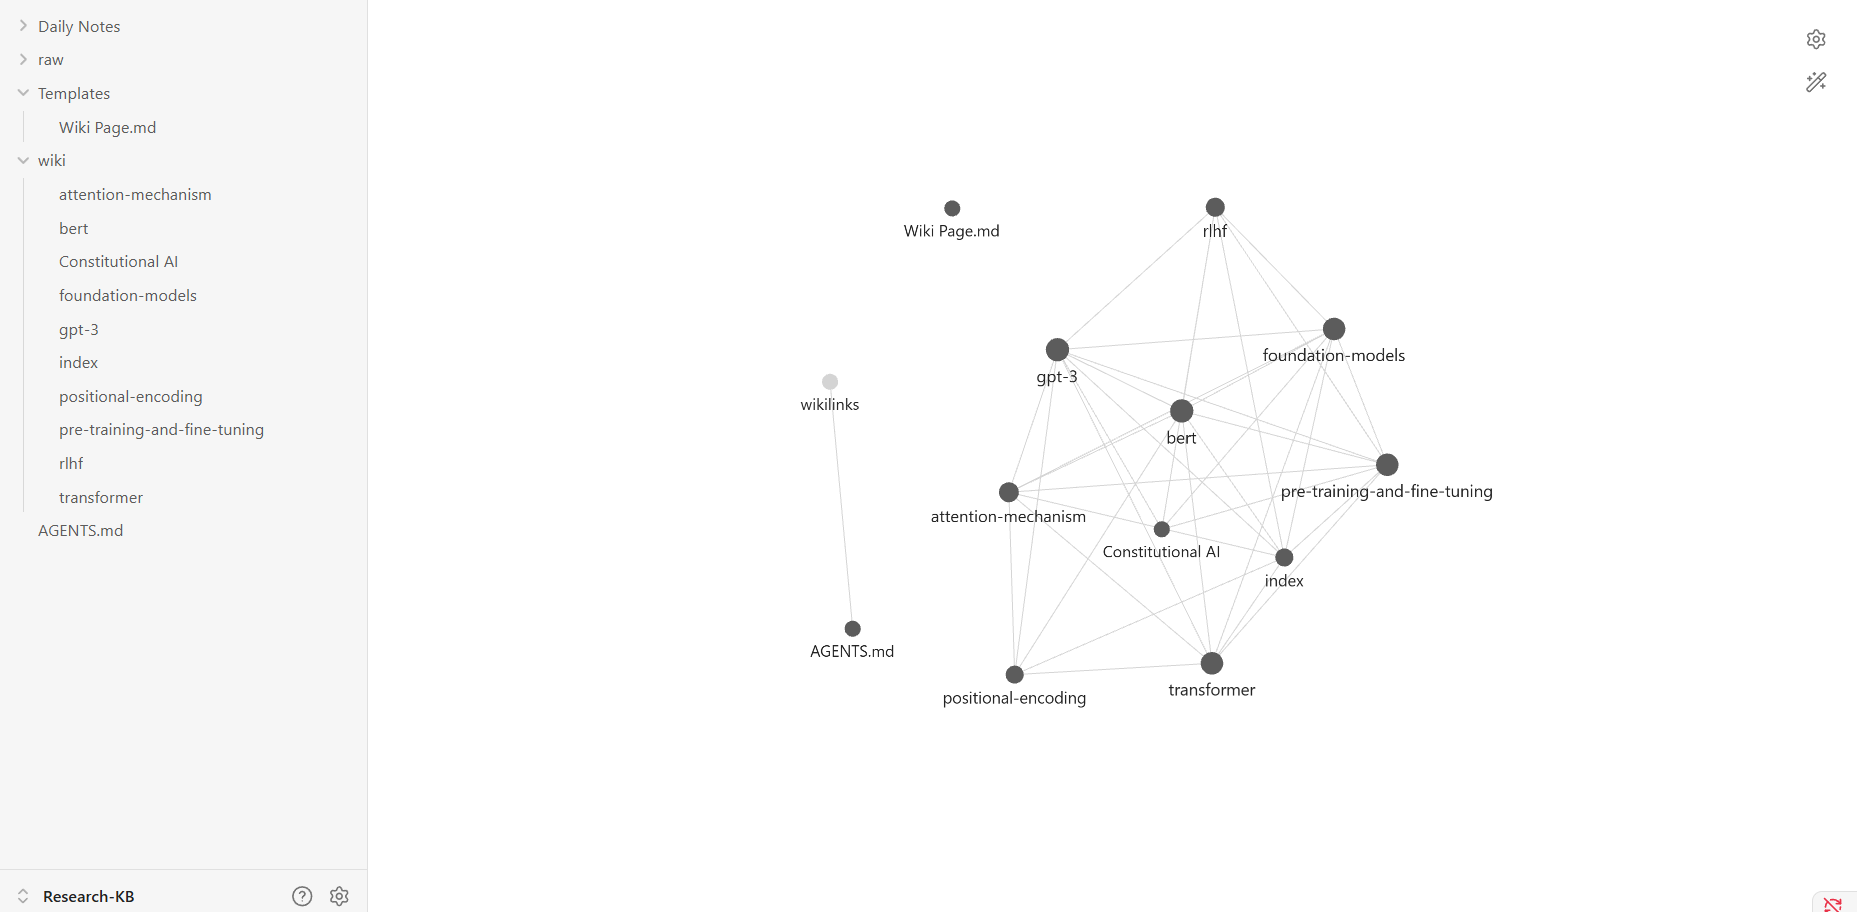
Opening Graph View
Press Ctrl+G (Mac: Cmd+G). Each note becomes a node. Each [[wikilink]] between notes becomes a connection line. The result is a live visual map of your knowledge base.
Click any node to highlight its direct connections. Highly-connected concepts are the core ideas in your research. Isolated dots are gaps — topics that exist but don’t yet connect to anything else. This graph-based structure is also what makes Obsidian a natural complement to Graph RAG approaches — your wikilinks are essentially a hand-curated knowledge graph that the agent can traverse.
Why Your Graph Starts Sparse
At this stage, most notes probably don’t reference each other much. The agent is doing keyword search across disconnected files. The next step turns it into a real traversable network.
Strengthen the Graph with the Agent
After this runs, reopen Graph View — you’ll see a noticeably denser network. The agent isn’t just searching anymore; it’s navigating a connected knowledge graph.
Filter by Tag
In the Graph View left panel → Filters → type a tag like transformer. The graph narrows to only notes with that tag. Useful for exploring a specific research thread without the rest of the vault in view.
Part 6 — Dataview: Query Your Knowledge Base Like a Database
What Dataview Does
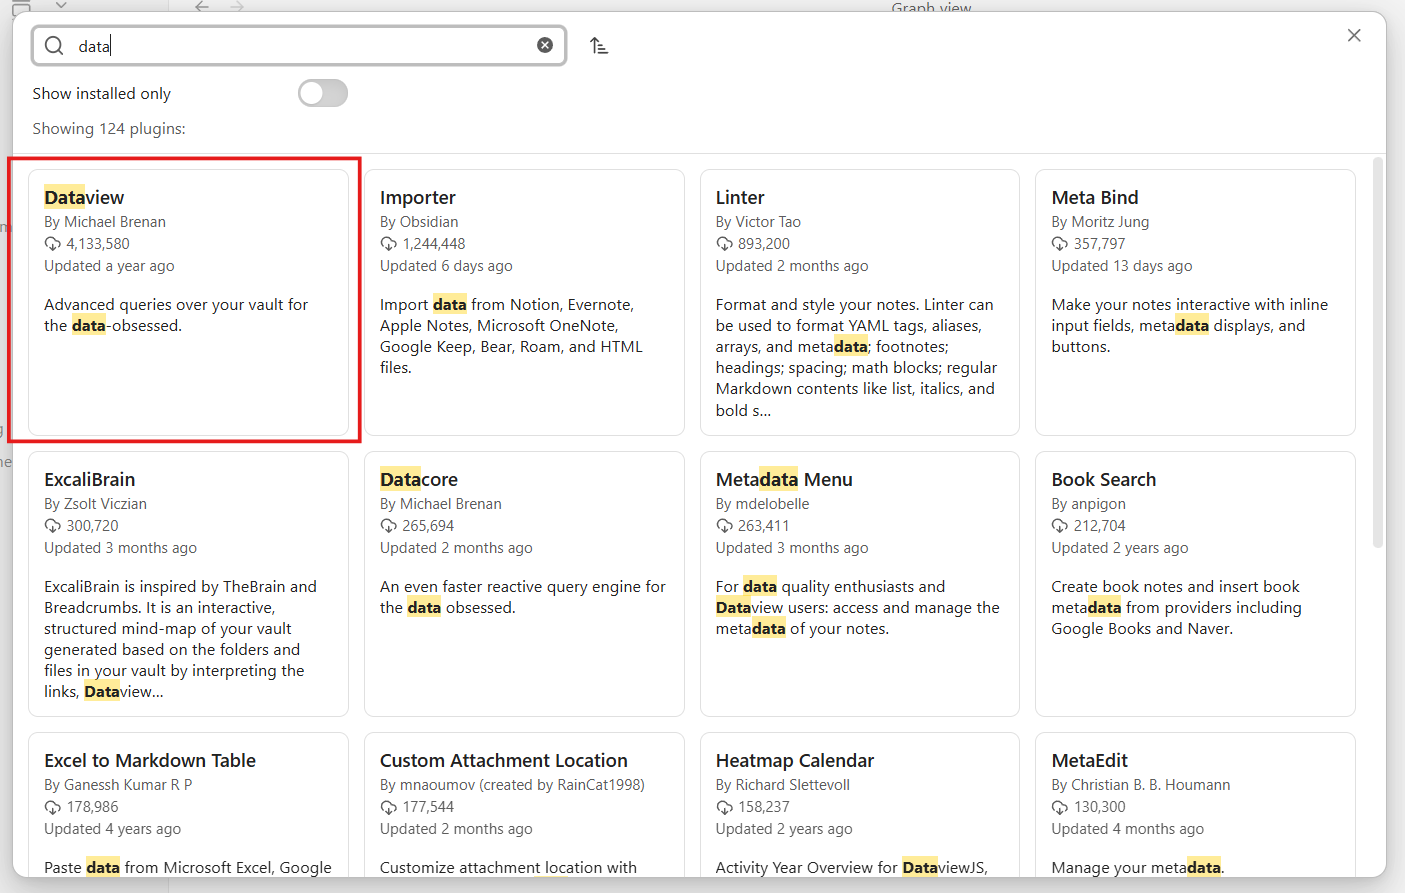
Dataview is a community plugin that adds SQL-like query syntax to Obsidian. Write a query inside any note and it renders as a live table, list, or card view — updated automatically whenever your vault changes. This is what makes your vault feel like a research database rather than a folder of files.
Install Dataview
Settings → Community plugins → Browse → search “Dataview” → Install and Enable.
Build Your Research Dashboard
Create Research Dashboard.md in the vault root:
Press Ctrl+E to switch to Reading View — the queries render as live tables pulling directly from your notes’ properties.
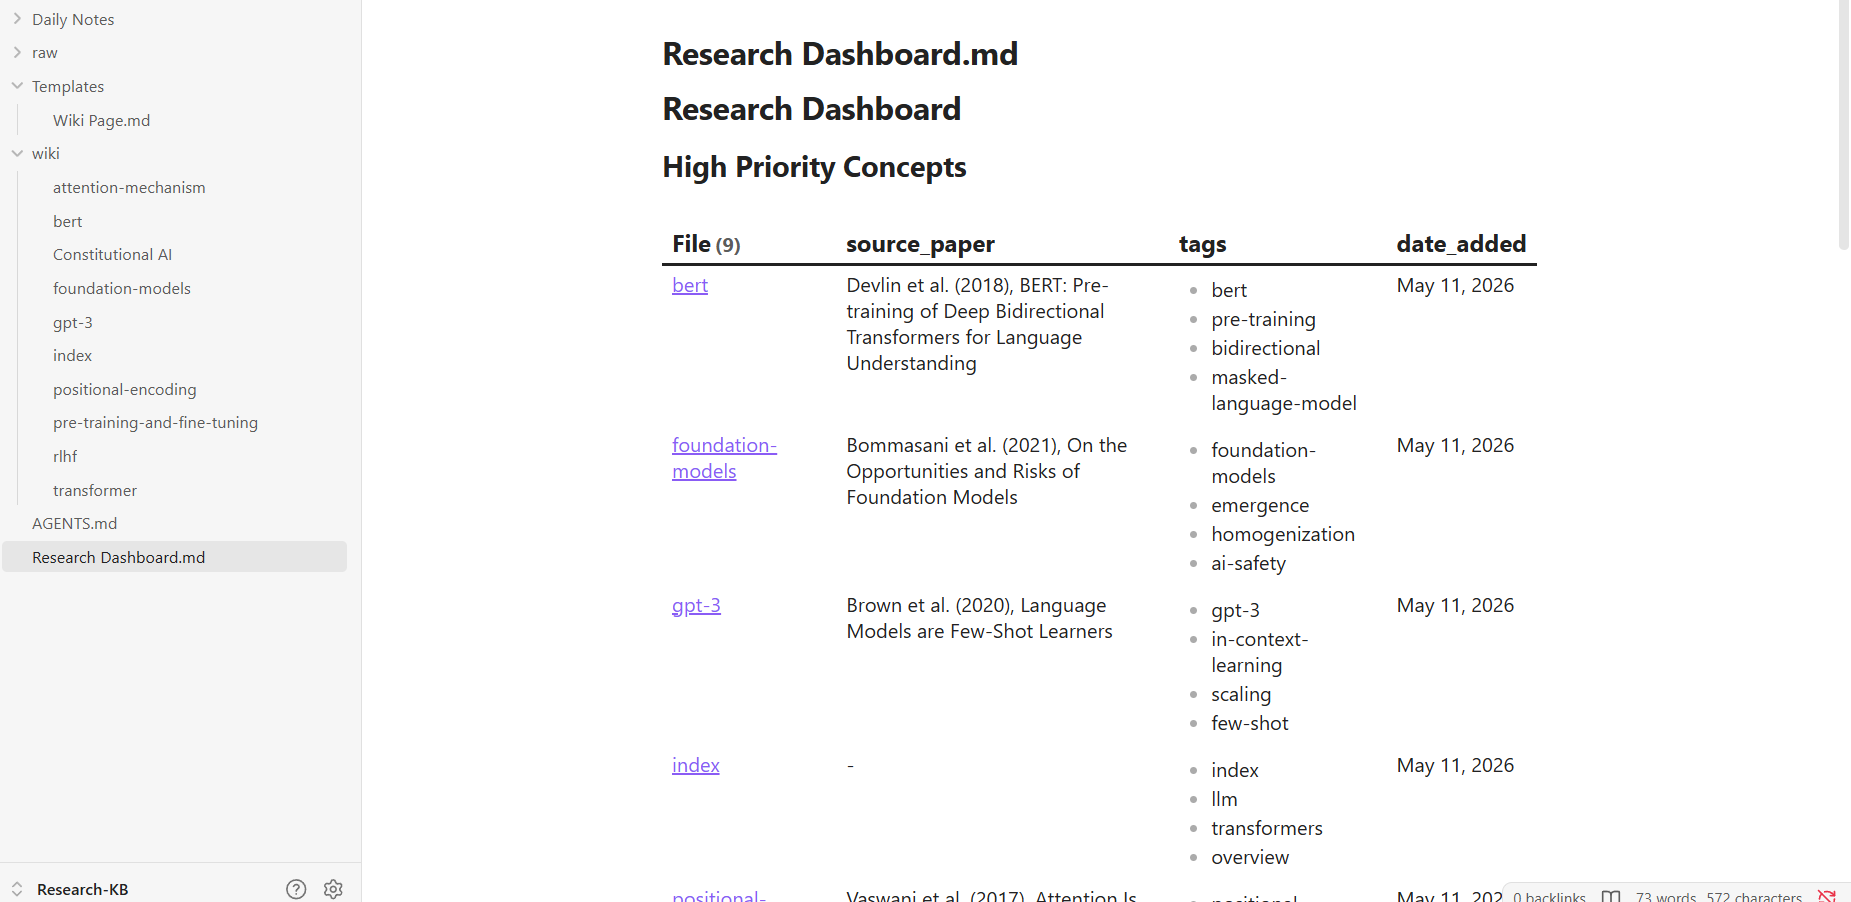
Every time the agent adds or updates a note, the dashboard refreshes automatically. No manual tracking required.
Cross-Paper Synthesis with the Agent
“Using my vault’s notes and their properties, which research concepts appear across the most papers? Read wiki/_index.md and individual pages to find concepts referenced in 3 or more source papers. List them ranked by how many papers mention them.”
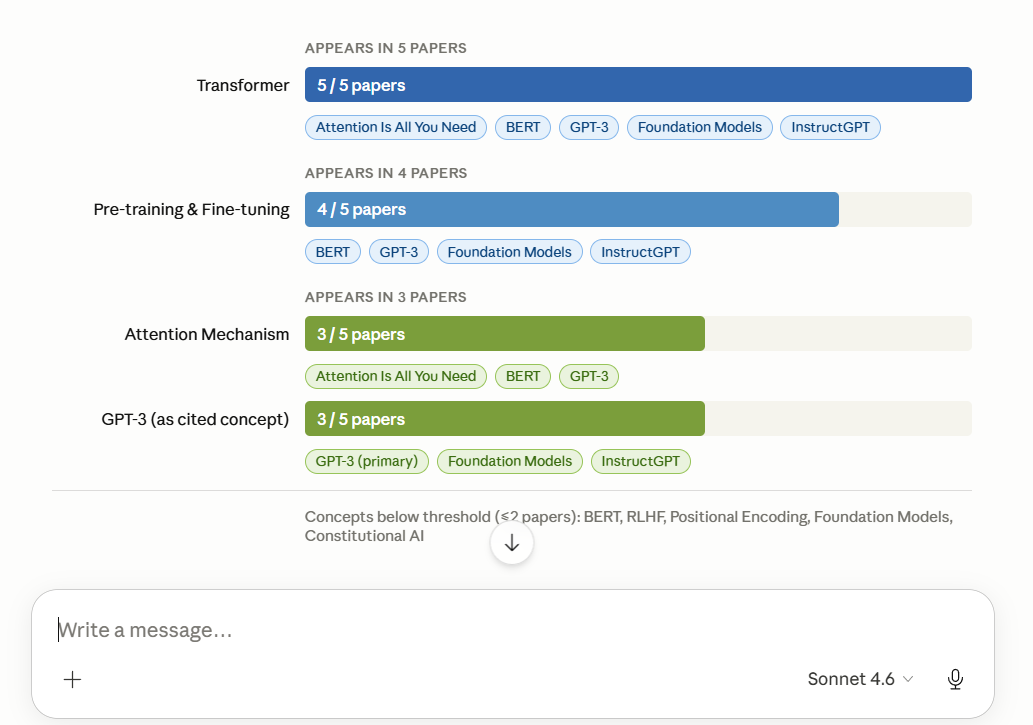
This is cross-paper synthesis — exactly what makes an AI knowledge base more valuable than uploading PDFs to a chat window one at a time. Unlike traditional Retrieval Augmented Generation which retrieves raw chunks on every query, your Obsidian wiki pre-compiles and connects knowledge so the agent reasons across it rather than rediscovering it from scratch each time.
Checkpoint: You now have a live research dashboard that updates automatically as your agent adds new content.
Part 7 — Daily Notes: Your Agent-Powered Research Log
What Daily Notes Do
Daily Notes creates one note per day using a template you define. Connected to your agent, this becomes a daily research briefing — what’s new in your vault, what questions are still open, what changed since yesterday. Over time it builds a complete, searchable log of your research progress.
Set It Up
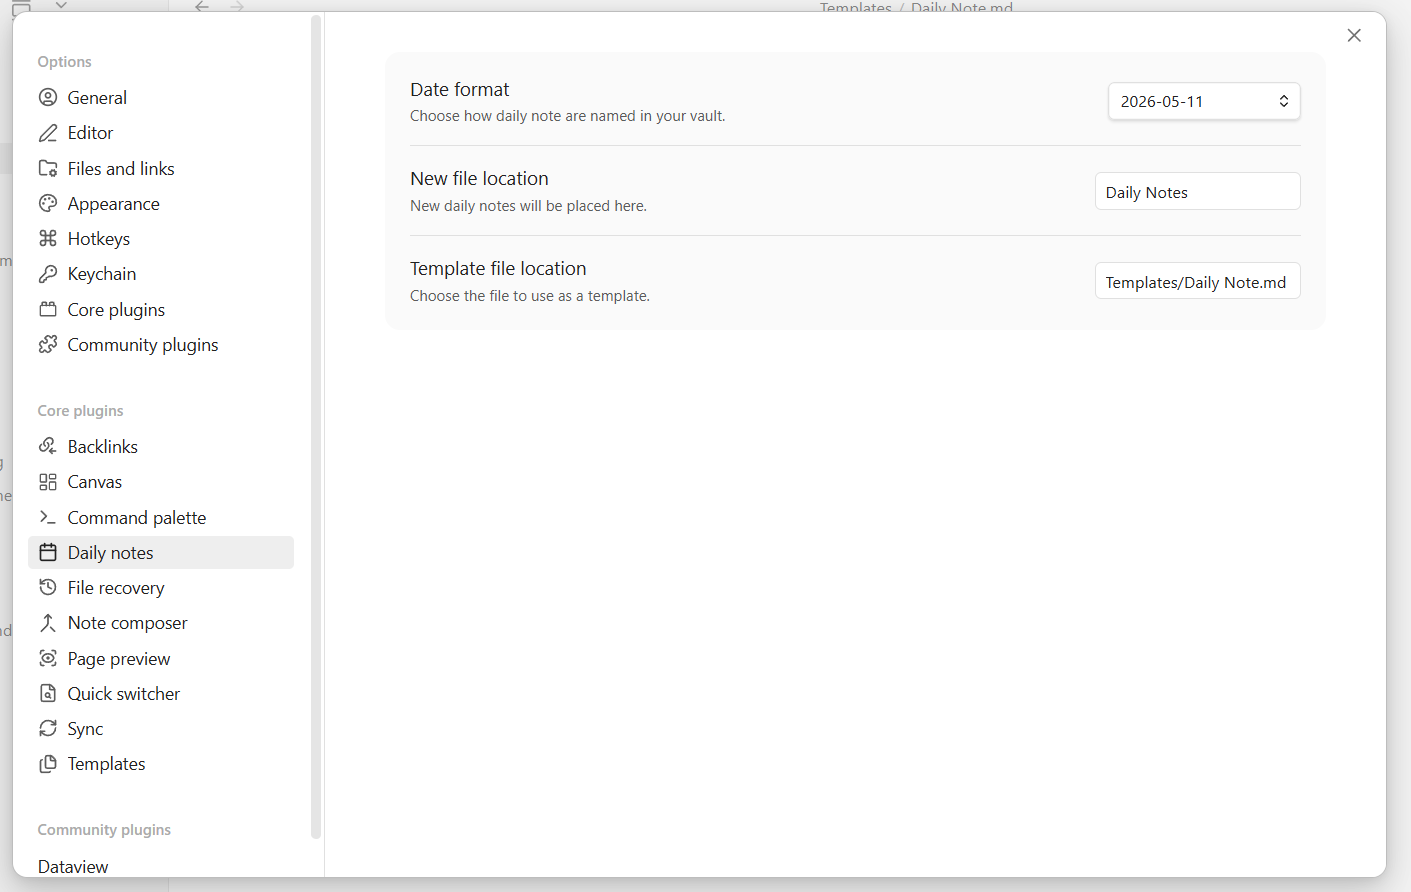
Settings → Core plugins → Daily notes → toggle on
Settings → Daily notes configure:
- Date format: YYYY-MM-DD
- New file location: Daily Notes/
- Template file: Templates/Daily Note
Create Templates/Daily Note.md:
Open and Fill Today’s Note
Press Ctrl+P → “Daily notes: Open today’s daily note” → Obsidian creates the note from your template automatically.
Then prompt the agent:
“Open today’s daily note in Daily Notes/. Read wiki/_index.md and the 5 most recently modified pages in wiki/. Fill in: New Wiki Pages Created, Pages Updated, and Agent Briefing. For the Agent Briefing, write 3–5 sentences summarizing what this knowledge base now covers and what the most significant gap is — a question the current papers can’t yet fully answer.”
Every morning this gives you an immediate picture of where your knowledge base stands and what’s worth exploring next.
Part 8 — Canvas: Map Your Research Visually
What Canvas Is
Canvas is Obsidian’s freeform visual workspace. Place notes as cards on a board and draw labeled connections between them. Unlike Graph View — which auto-generates from wikilinks — Canvas is intentional. You decide what to show and how to arrange it.
It’s ideal for mapping a specific research question visually: how transformer architecture evolved, what the competing approaches to alignment are, which papers build on each other. For example, if your wiki covers foundational papers like Attention Is All You Need, you can read our guide to the attention mechanism for deeper context on what to put on the canvas.
Create a Canvas Manually
- Ctrl+P → “Canvas: Create new canvas” → name it Transformer Evolution.canvas
- Right-click the canvas → Add note from vault → select 4–5 transformer-related wiki pages
- Arrange them roughly chronologically left to right
- Hover over a card edge → drag to another card to draw a connection
- Double-click the connection line → add a label like “builds on” or “extends”
Let the Agent Build a Canvas for You
Canvas files are JSON under the hood — the agent can write them directly.
“Read wiki/_index.md and identify the 6 most important concepts related to transformer architecture and language model development. Create a file called Transformer Evolution.canvas in the vault root using Obsidian canvas JSON format. Arrange the concepts roughly chronologically left to right, with labeled edges showing relationships like ‘builds on’, ‘introduces’, ‘extends’, or ‘applies to’.”
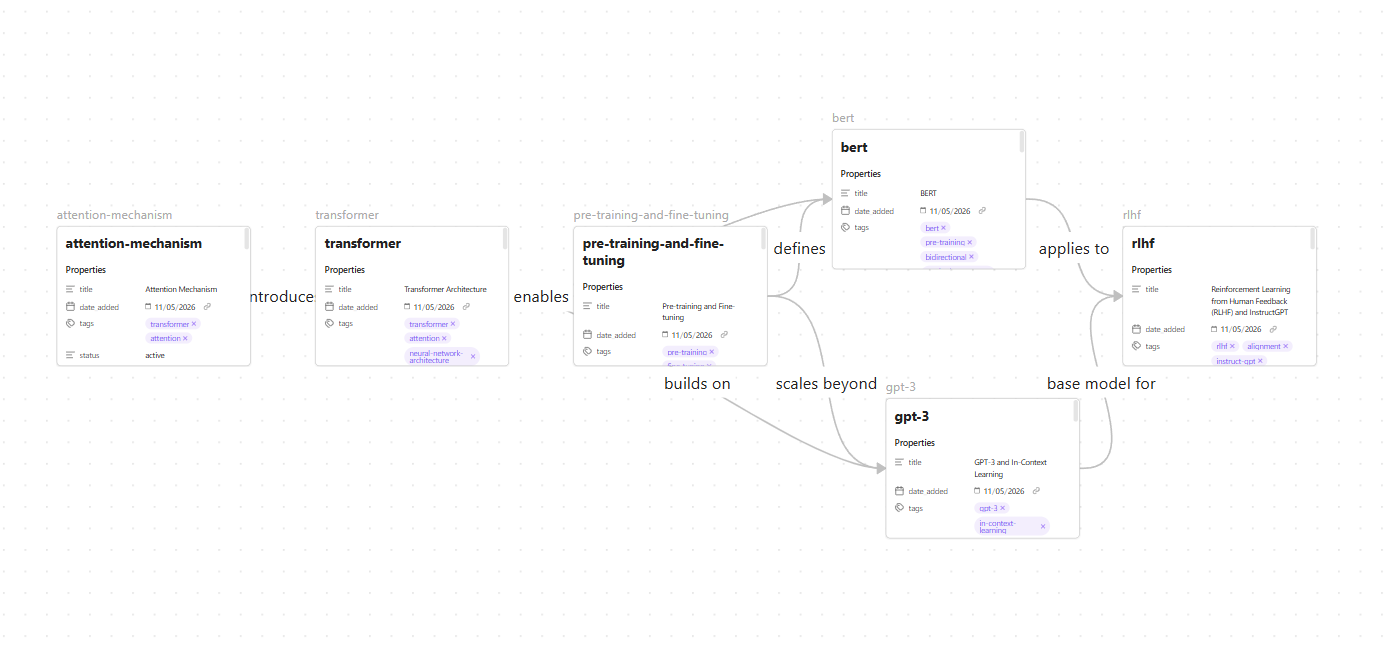
Open the .canvas file in Obsidian to see the pre-built visual map. Drag cards around to refine the layout.
Part 9 — The Full Workflow End to End
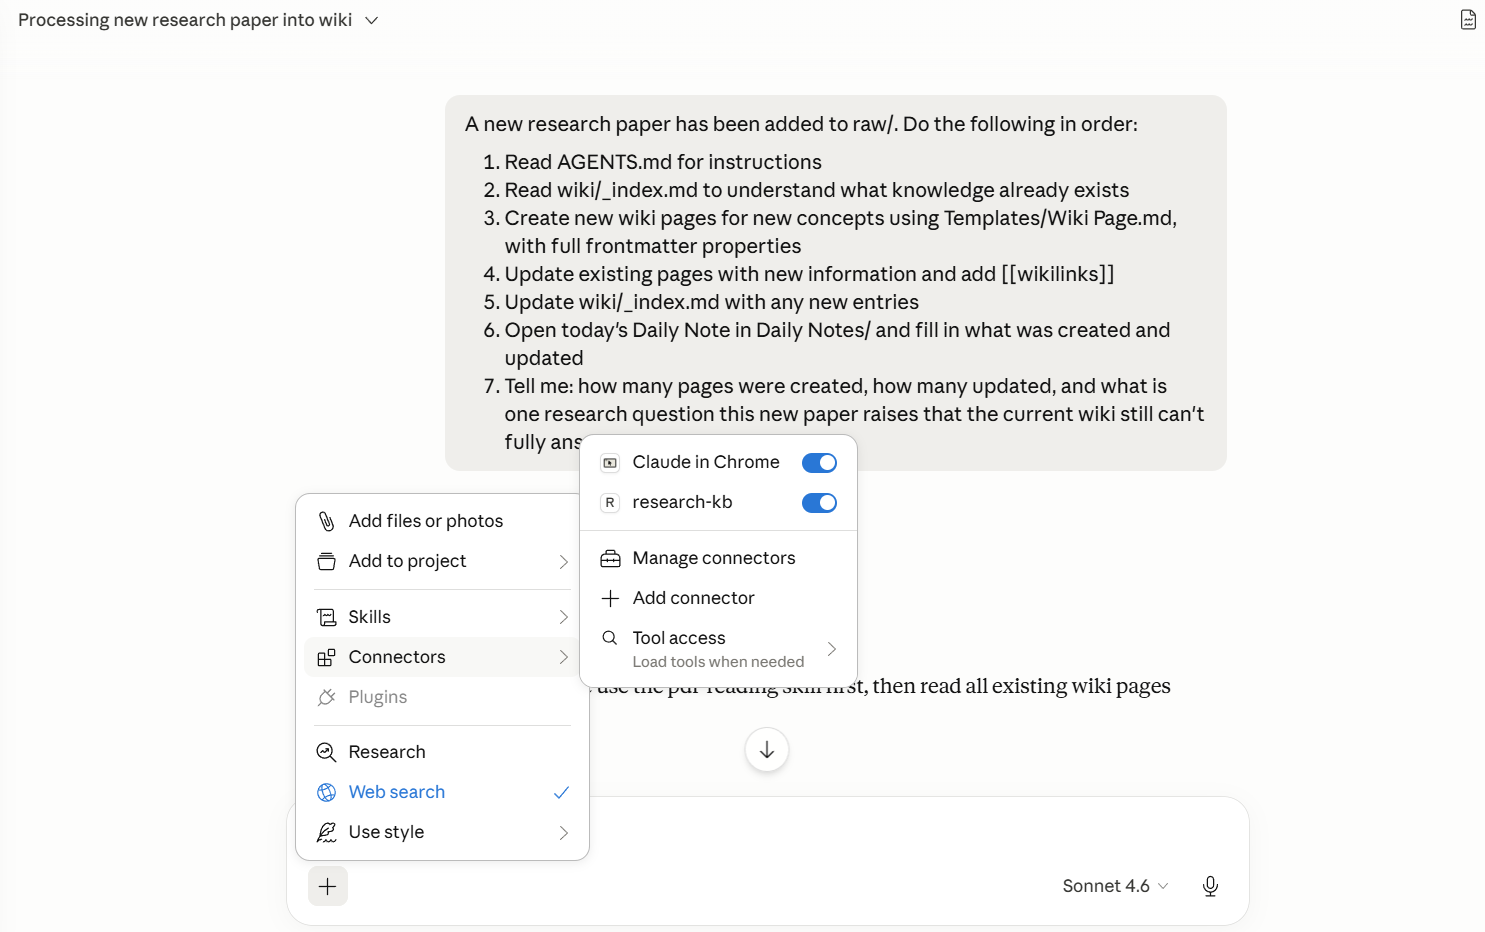
Every feature you’ve set up now works together as a single loop. Drop a new PDF into raw/ and run this one prompt:
Watch Obsidian as it runs — Graph View updates with new connections, Dashboard tables refresh with new entries, the Daily Note fills in automatically. That’s the complete loop: raw paper in, structured queryable knowledge out. This is what agentic AI systems look like in practice — not a chatbot answering questions, but an agent actively maintaining and building knowledge on your behalf.
Quick Reference: What to Check at Each Step
| Feature | What should work |
|---|---|
| Vault + MCP | Agent lists vault files and creates a test note |
| Tags & properties | Every wiki note has a filled properties panel |
| Templates | Agent-created notes match the template exactly |
| Graph View | Denser network after agent adds wikilinks |
| Dataview | Dashboard tables render in Reading View |
| Daily Notes | Today’s note created with agent briefing filled in |
| Canvas | Canvas file opens with cards and labeled edges |
| Full workflow | All of the above triggered from one prompt |
Frequently Asked Questions
Do I need an Obsidian paid plan to follow this tutorial?
No. Everything here — vault creation, community plugins, MCP connection, Graph View, Dataview, Canvas — is available on Obsidian’s free personal plan. The Obsidian Sync paid plan is only needed if you want to sync across devices, which isn’t required for this setup.
Does Obsidian need to be open for the MCP to work?
For the Filesystem MCP (Option A), no — Claude reads files directly from disk regardless of whether Obsidian is open. For the REST API (Option B), yes — Obsidian must be running because the agent is calling Obsidian’s internal API.
What happens to my knowledge base if I switch AI models?
Nothing. Your vault is local Markdown files that live independently of any AI account or model. You can switch from Claude to GPT to a local model without losing a single note. That’s one of the core reasons Obsidian is the right foundation for this.
How do I stop the agent from creating inconsistent notes?
Two things prevent this: a detailed AGENTS.md with explicit rules, and a well-structured template the agent is always told to use. The more specific your AGENTS.md, the more consistent the output.
Can multiple people share the same knowledge base?
Yes — put the vault in a Git repository. Each collaborator can add sources and run agent sessions; Git handles merging. A good practice for teams is keeping a personal vault separate from the shared agent-facing wiki, pulling only reviewed content into personal notes.
My Dataview tables show no results — what’s wrong?
The most common cause is missing or inconsistent frontmatter. Make sure every note in wiki/ has the properties the query expects (status, importance, tags, source_paper) and that values are spelled consistently — “active” and “Active” are treated as different values by Dataview.
Wrapping Up
Obsidian turns a folder of research papers into a living knowledge base that compounds over time. Every new paper makes the agent smarter. Every wikilink the agent adds makes the graph denser. Every daily note builds a research log you can look back on months later.
The key shift is moving from pasting documents into a chat window to building a persistent system that grows with your research. With Obsidian, MCP, and the workflows in this tutorial, your AI agent has the context it needs — not just for today’s session, but for every session going forward.